Yogurt Strainer: Top-Rated Tool for Thick Yogurt
How to Prepare Ideal Greek Yogurt Through a Strainer
Creating Greek yogurt at home provides a rewarding culinary experience. It enables control over ingredients and flavors, ensuring a product tailored to personal preferences. The process begins with selecting quality milk and a yogurt starter. Understanding the steps involved is essential for achieving the desired thickness and taste. However, common pitfalls can occur during fermentation. Knowing how to navigate these challenges can make all the difference in creating a perfect batch.
Why Prepare Greek Yogurt at Home?
Preparing Greek yogurt at home provides multiple advantages that resonate with health-conscious individuals. One key benefit is the control over ingredients, permitting the exclusion of additives and preservatives frequently found in store-bought varieties. This provides a cleaner, more natural product tailored to personal dietary needs. Additionally, the homemade alternative typically contains higher protein content, making it a wholesome alternative for those looking to boost their intake.
Cost-effectiveness represents another important consideration; making Greek yogurt at home can be much cheaper than purchasing it pre-made. The simple process promotes experimentation with different flavors and textures, allowing individuals to create personalized blends that fit their taste preferences. Additionally, the satisfaction gained from crafting a staple food item can strengthen culinary abilities and promote a greater appreciation for nutritious food choices. All in all, the advantages of making Greek yogurt at home go beyond nutritional value, promoting a deliberate approach to food preparation.
Crucial Elements for Homemade Batch Greek Yogurt
Preparing homemade Greek yogurt requires a few key ingredients that are both straightforward and easily accessible. The primary ingredient is milk, which can be regular, low-fat, or skim, according to personal preference for creaminess. Whole milk typically yields a thicker texture, while reduced-fat options may yield a less thick yogurt.
The second key element is a yogurt starter, which contains live active cultures. This can be commercially available plain yogurt or a specialized yogurt starter culture obtained from health food stores. The starter is vital for fermentation, supplying the necessary bacteria to transform the milk into yogurt.
In addition, a fine mesh strainer or cheesecloth is needed for straining the yogurt, helping achieve the thick consistency characteristic of Greek yogurt. With these ingredients on hand, anyone can begin the journey to create delicious homemade Greek yogurt.
How to Prepare Greek Yogurt: A Complete Guide
In making Greek yogurt, comprehending the essential ingredients is crucial for achieving the desired consistency and taste. The straining process holds a key role in transforming conventional yogurt into its thicker counterpart. Furthermore, proper storage methods make sure that the yogurt keeps fresh and pleasant for an extended duration.
Yogurt Ingredients You'll Need
To properly make Greek yogurt, a few essential ingredients are required. The primary ingredient is milk, which can be whole, low-fat, or skim, depending on the desired creaminess. The quality of the milk plays a crucial part in the final product. Next, a yogurt starter culture is needed; this can be shop-bought yogurt with live active cultures or a specific yogurt starter. This culture is vital for fermentation, as it introduces the beneficial bacteria required for thickening the milk. Additionally, a thermometer is useful for monitoring the temperature during the fermentation process. While optional, flavorings such as honey, vanilla, or fruit can elevate the yogurt's taste after it is made. With these ingredients, one can start on making delicious Greek yogurt.
Straining Process Explained
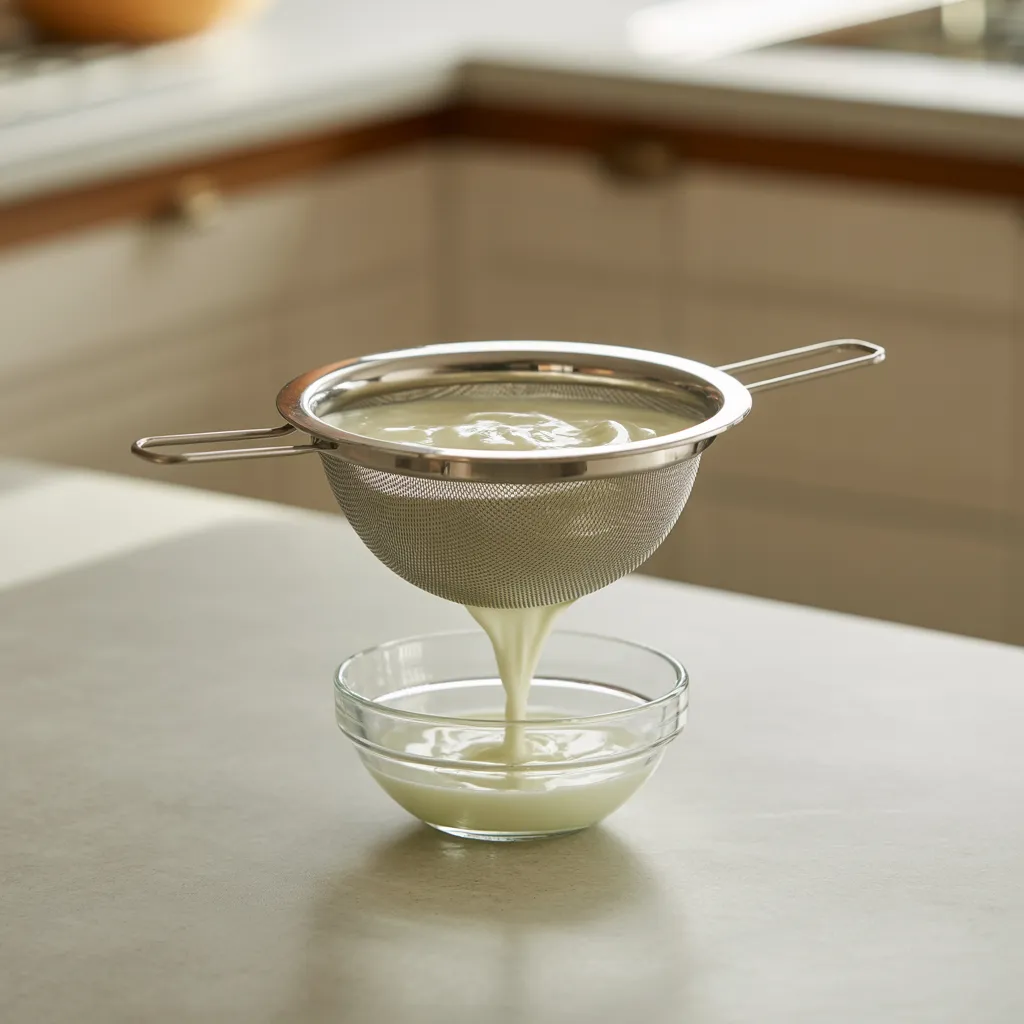
Once you've collected the essential ingredients, the straining process is a critical step in attaining the thick, creamy texture characteristic of Greek yogurt. To start, one must place a fine mesh strainer over a large bowl. A cheesecloth or coffee filter can be set inside the strainer to catch the whey. Next, the yogurt is poured into the strainer, enabling the liquid to drip into the bowl below. This process can take multiple hours, depending on the desired thickness. For a thicker consistency, yogurt should be left to strain longer, frequently overnight in the refrigerator. Once the straining is concluded, the resulting yogurt can be removed from the cloth or filter, offering a rich and delightful texture excellent for various uses.
Tips For Storing Yogurt
Appropriate storage is crucial to preserve the freshness and taste of homemade Greek yogurt, making certain it remains safe for consumption. After preparation, the yogurt should be placed in an airtight container to minimize exposure to air and contaminants. It is advisable to refrigerate the yogurt right away, as it should be stored at a temperature below 40°F (4°C). Homemade Greek yogurt generally lasts for about one to two weeks in the refrigerator. To prolong its shelf life, freezing is an option; however, the texture may change upon thawing. When serving, it is important to use clean utensils to prevent introducing bacteria. Labels with preparation dates can help monitor freshness and maintain ideal quality during storage.
Ideas for Flavoring for Your Homemade Greek Yogurt
What creates homemade Greek yogurt truly delightful is the vast array of flavoring choices that can elevate its taste. A simple addition of honey or maple syrup can add natural sweetness, while vanilla extract provides a comforting aroma. For a fruity touch, fresh berries, sliced bananas, or a dollop of fruit preserves can enhance both flavor and texture.
Savory lovers could try options like a pinch of sea salt, some olive oil, or a combination of herbs such as dill or mint. Various nuts and seeds, such as chia seeds or almonds, provide crunch while boosting nutritional value.
Cocoa powder or matcha may offer a unique flavor profile, attracting those who prefer a decadent chocolate or earthy taste. At the end of the day, the choices are limited only by one's imagination, making each serving of Greek yogurt a customizable delight.
What Should You Do When Your Greek Yogurt Won't Set Properly?
When homemade Greek yogurt fails to set correctly, it can be both perplexing and frustrating for the person making it. A number of variables might be causing this situation. Initially, the ideal temperature during the fermentation process should be maintained between 110°F to 115°F (43°C to 46°C). Should the temperature be too cold, the yogurt may not achieve the proper thickness.
Moreover, the quality of the starter culture plays a significant role; using live, fresh cultures is vital for successful fermentation. If the yogurt appears too runny, it could require more time to set.
Another factor to consider is the milk used; whole milk usually yields thicker yogurt when compared to low-fat or skim milk.
Last but not least, confirm that the fermentation container is clean and devoid of contaminants that could obstruct the process. By managing these considerations, the yogurt maker can boost the probability of achieving that coveted, creamy consistency in their homemade Greek yogurt.
Storing Your Homemade Greek Yogurt
Storing homemade Greek yogurt correctly is crucial to preserving its texture and flavor after fermentation. Once the yogurt has been processed, it should be moved into an airtight container to stop exposure to air, which can cause spoilage. A glass or plastic container with a well-sealed lid is excellent for this purpose.
To ensure maximum freshness, homemade Greek yogurt can be refrigerated for up to two weeks. It is best to label the container with the preparation date for easy reference. For extended storage, yogurt can be frozen in smaller portions. Using ice cube trays or freezer-safe bags allows for convenient thawing as needed.
When ready to consume, thaw the yogurt in the refrigerator overnight, and be aware that some separation may occur. Gently stirring can return it to its smooth consistency. explore this Appropriate storage techniques will extend the yogurt's freshness and lifespan.
FAQ
Can Greek Yogurt Be Made Using Non-Dairy Milk?
Indeed, dairy-free milk may be employed to make Greek yogurt, while the results may vary. It generally requires specialized cultures and methods to achieve a similar texture and flavor to traditional yogurt.
How Long Does Homemade Greek Yogurt Last in the Fridge?
Greek yogurt made at home generally lasts in the refrigerator for seven to fourteen days when properly stored in an airtight container. Its quality can decline over time, so consuming it sooner guarantees better taste and consistency.
Is It Feasible to Reuse Yogurt for Fresh Batches?
You can indeed reuse yogurt as a starter for fresh batches. Adding a small amount of your existing yogurt can help introduce good bacteria, making certain of successful fermentation in your next homemade yogurt batches.
Is It Possible to Freeze Greek Yogurt for Future Use?
Indeed, Greek yogurt can be frozen for subsequent use. Nevertheless, its texture could transform upon thawing, becoming gritty. It remains perfectly edible and can still be utilized in cooking or smoothies.
Which Types of Strainers Perform Best for Greek Yogurt Making?
Fine mesh strainers, cheesecloth, and muslin cloths are excellent for preparing Greek yogurt. They effectively extract whey from yogurt mixture, producing a thicker texture. Each choice delivers different levels of filtration, suited to personal preference.